|
Introduction
The exporter is intended for exporting STATIC meshes from gMax or 3D-Studio to Nebula2 (as of 18-OCT-2004).
The exporter will not export any materials but will place a standard Nebula shader for displaying.
The provided script is given in plain source so you can change it for your needs.
The max script exporter you use is a hybrid exporter. It will work with gMax and even better with 3D Studio.
This page describes the gMax workflow, a FREE 3D modelling tool similar in use to 3D Studio Max.
Before using it please read the license comming with this page.
You can find the download here or in the download section
First of all assure you have gMax installed, if not you can download it from
www.descreet.com for FREE. You can download a zip file containing the
exporter, documentation and examples from www.3D-Inferno.com for FREE too.
You can download the Nebula 3D Engine from www.nebuladevice.org
Installing the script
Extract the files to a temporary directory, then startup gMax.
 GMax will open and show you its normal four window layout.
Register the script
First thing to do now is to install the script withing gMax.
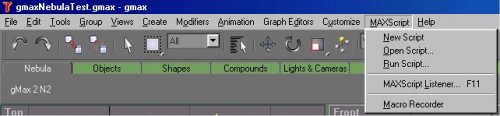
To do so open up MaxScript -> Run Script from the gMax menu.
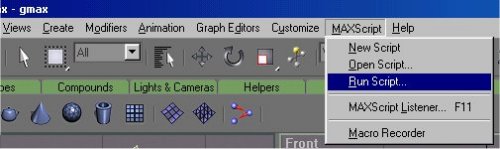 A browse window will open where you can select the extracted max script file
(its ending with .ms for Max Script) for
running. You should not see any output or error messages as this step
only registers the script withing the application.
A browse window will open where you can select the extracted max script file
(its ending with .ms for Max Script) for
running. You should not see any output or error messages as this step
only registers the script withing the application.
Add a new tab panel for ease of use
Now we will start to customize the user interface so we have a button in gMax
where we can call the script from.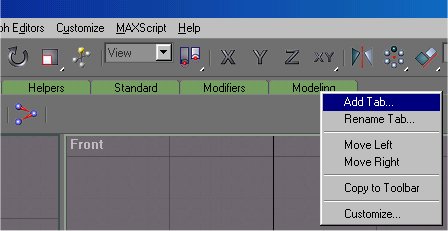 To do so right click on the last tab so the following menu will show up.
Please select the topmost item (Add Tab) which will add
such one. A window will show up asking you for a name the tab should have.
You can name it Nebula, or whatever suits you
best.
To do so right click on the last tab so the following menu will show up.
Please select the topmost item (Add Tab) which will add
such one. A window will show up asking you for a name the tab should have.
You can name it Nebula, or whatever suits you
best.  If you like you can also change the order of the tabs with a right click and selecting move left/right.
Populate it with buttons you need
So now we have a new tab where we can place all the buttons we need. To do this we right click on the tab bar
(the space below the tab name) and select from the context menu the customize item.
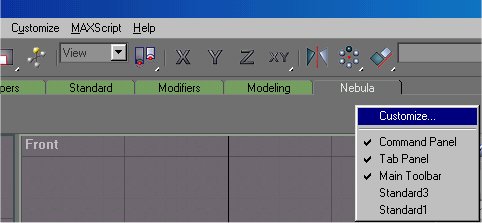 The gMax customization menu will pop up from where you can select the functions you would like to
appear on your tab. In the drop down list select 3DI which should be far at the top of the list.
By doing so you will be shown all functions in this group. Here you will find the Nebula 2 exporter
you just plugged in by running the max script.
The gMax customization menu will pop up from where you can select the functions you would like to
appear on your tab. In the drop down list select 3DI which should be far at the top of the list.
By doing so you will be shown all functions in this group. Here you will find the Nebula 2 exporter
you just plugged in by running the max script.
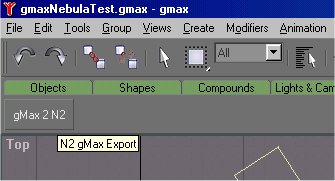
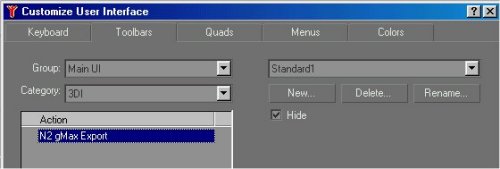 You can now place the macro script function as a button on your own tab by dragging the
entry N2 gMax Export to your tab panel. You can see the resultin the image below. If you want
you can also change the appearance of the button by providing a bitmap or a different name,
but this is your own topic to solve.
You can now place the macro script function as a button on your own tab by dragging the
entry N2 gMax Export to your tab panel. You can see the resultin the image below. If you want
you can also change the appearance of the button by providing a bitmap or a different name,
but this is your own topic to solve.
 Now you are finished with integrating the exporter into gMax. Let's start ?laying around with it!
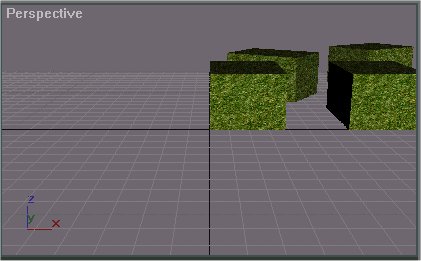
Testing the exporter
For testing we will use the provided file gmaxNebulaTest.gmax. It should be in the same directory
you extracted the script file to. So open it up if you haven done so far. The provided
exporter will export all meshes into the Nebula 2 format and provide a script to load
the scene into the NebulaDevice.
Exporter settings
The exporter has several settings which will influence the export behavior. GMax has a
restriction on the possibilities you can use withing the scripts. For example in gMax
you can not create files. So how will we export something ? Well, we need some
workaround by using the listener in gMax. If you should know a better method, change the
script and share it, you are free to do so.
For now, click on the just created button after the scene has loaded.
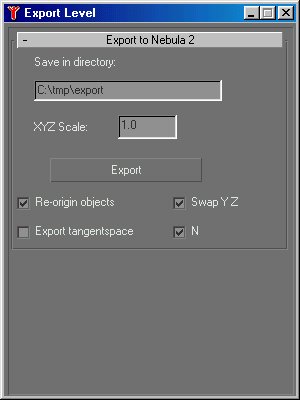 The options are as follows:
- Save in Directory
Does not work for gMax users, only for 3D Studio Max users where you can specify the
directory your files should be placed in.
- XYZ Scale
You can rescale the whole scene by this factor. The scaling will affect all meshes as
the modifier will be placed in the toplevel load script.
- Export
This button will start the export process.
- Re-origin objects
This parameter will reorigin the meshes around the 0/0/0 coordinate. This will export
the meshes in local space, not world space and place the world transform in the
node inside the load file.
- Swap Y Z
Nebula coordinates are left handed, gMax has a right handed coordinate system for output (but
uses the left handed internally). If you leave the YZ swap out your objects will seem
rotated. To fix this activate the parameter.
- Export tangentspace
This parameter will compute the tangent space for your meshes. Can be usefull if you want
fancy shader stuff. If you do this please active the N parameter too.
- N
Export normals. Activate this option to export mesh normals.
If you close the exporter the options will be saved within your gmax scene file, so after reopening
your changed settings can be restored.
GO! Export
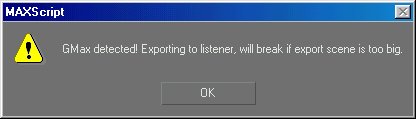
After activating the export button you will receive a notification that you are using gMax
and thus will not be able to use all features of this exporter (the export into files).
 Finally if all went well you should receive the following end notification. If any errors occur
you should find them in the listener window too, giving you at least a hint what was wrong.
If not you can still place a messagebox command to step into the script code.
Finally if all went well you should receive the following end notification. If any errors occur
you should find them in the listener window too, giving you at least a hint what was wrong.
If not you can still place a messagebox command to step into the script code.
 But where is the output ?
Working around gMax
The output for gMax is nor usable from the start. We have to extract it from the listener and place
it into fil for Nebula to be able to work with your scene. So open up MaxScript -> MaxScript Listener
from the menu. (pressing F11 will most of the time NOT work from experience)
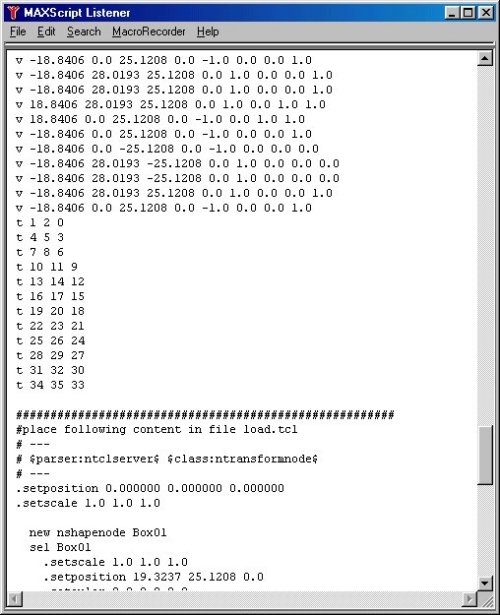
 In the script listener window you should be able to see your output. But what does it mean ?
The exporter works along the meshes creating an entry in the listener with the mesh data for
the mesh in Nebula 2 format. After all meshes are written, a tcl script is written to the
listener which will let you load the files into Nebula. But first you have to copy the content
of the listener to a file.
In the script listener window you should be able to see your output. But what does it mean ?
The exporter works along the meshes creating an entry in the listener with the mesh data for
the mesh in Nebula 2 format. After all meshes are written, a tcl script is written to the
listener which will let you load the files into Nebula. But first you have to copy the content
of the listener to a file.
 For each object in the scene (only meshes get exported at the moment) you will find a section
starting
For each object in the scene (only meshes get exported at the moment) you will find a section
starting
#place following content into the file XYZ
So starting from this up to the next occurence of the above mentioned comment try to copy this into the named file.
Be carefull as gMax also limits the copy & paste buffer, so it might be possible you will have to go through
several copy&paste passes for completing one mesh.
But where ?
Simple: Create a directory wherever you would like Nebula to find your meshes and name it meshes.
I use $NEBULA_DIR/export/meshes/examples for example. If you would like to place it by default into
a different directory you will need to change the path in the last step (the load tcl script) in all places stating
.setmesh In this meshes directory create each of the named
files the exporter suggests in the comments. Then open the files and paste the content up to the next comment
into the suggested file. Your directory should now contain the following files with the corresponding content:
 Place the last file content which looks different from the mesh definitions into the parent directory of meshes.
You can name it differently for Nebula to be able to recognize it automatically (by naming it .n2 and
configuring nebula to open the files by using the -view parameter). The example output is included for your
convenience, so you can compare your result with the suggested one.
Place the last file content which looks different from the mesh definitions into the parent directory of meshes.
You can name it differently for Nebula to be able to recognize it automatically (by naming it .n2 and
configuring nebula to open the files by using the -view parameter). The example output is included for your
convenience, so you can compare your result with the suggested one.
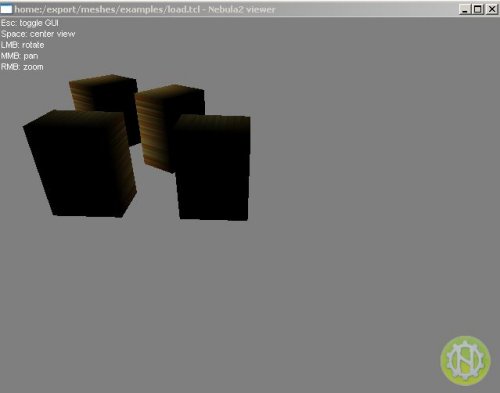
 If you have finished this you can preview your exported scene in Nebula 2. To do so either rename the load.tcl file ending
into .n2 if you have not already done so. If you have installed the Nebula 2 SDK it will be automatically recognized.
If no fancy icon will appear you will have to configure it by your own (this will not be covered here).
You can also open the scene from the commandline by issuing the following command:
If you have finished this you can preview your exported scene in Nebula 2. To do so either rename the load.tcl file ending
into .n2 if you have not already done so. If you have installed the Nebula 2 SDK it will be automatically recognized.
If no fancy icon will appear you will have to configure it by your own (this will not be covered here).
You can also open the scene from the commandline by issuing the following command:
$PATH_TO_YOUR_NEBULA_BIN_WIN32_DIR/nviewer.exe -view meshes:examples/load.tcl
You should now be seeing the example, or your own scene.
 That's all, enjoy and share your extensions to Nebula. But most of all enjoy :-)
Tom
Something missing? Mail to 
|
|
 | 2009-06-01
WoW Importer for Max |
| The World of Warcraft tool for 3D Studio has been updated. It now converts model files from WoW Client version 2.x (upto 2.7) and displays correct animations for multi mesh models. The script can be found here.... |
 | 2007-03-07
nGUI explained |
| If you ever wanted some more details on the nebula2 nGUI System you can find it in the nGUI System article. |
| 2006-10-17
Mangalore entity ID's |
| If you need information about the mangalore entity ID usage have a look here.. |
| 2006-08-06
Mangalore Articles |
| Added a new section about the mangalore game framework from radonlabs. The section contains some articles about my experience with mangalore. Read more here: |
| 2006-03-10
Free models |
| Finally some free models for the Radonlabs SDK. You can download them here. |
|
|